
Hey everyone, I've been up to a lot lately and not been posting on the blog as frequently as I'd like. I'll give you all an update on what all I've been up to and whats planned but now I've got an interesting photo to share with you and how I composited it!

It all started about a year ago. Thats right, I haven't touched these photos for over a year, but I had some inspiration to revisit them on my hard drive, and found a few that I thought might composite well together!
Here are the 2 images I started with.

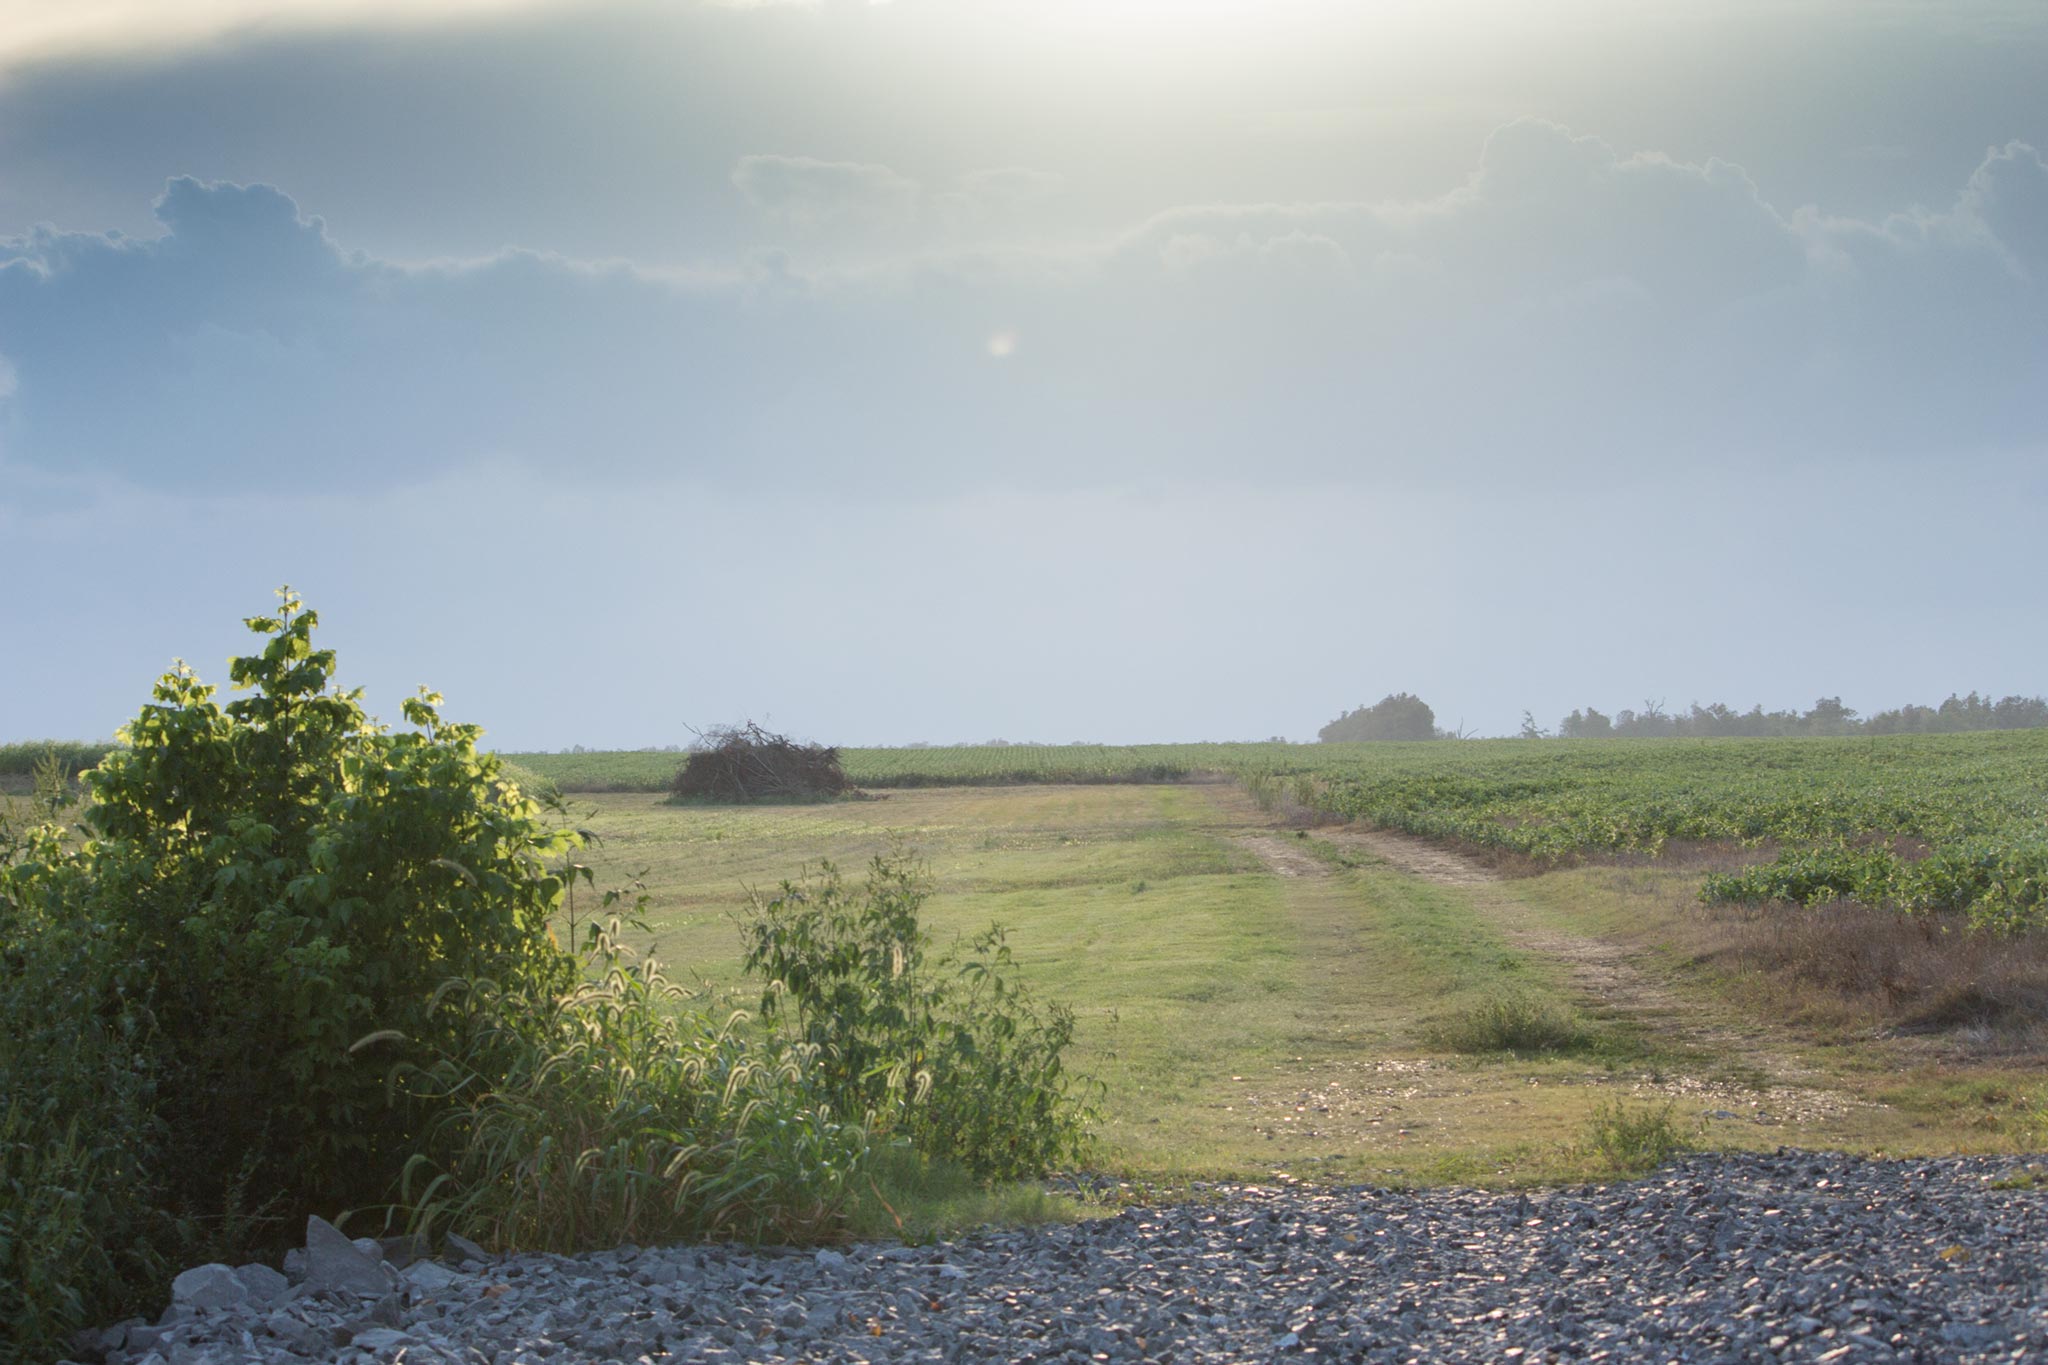
I had this awesome open field, and a really cool looking airplane. Neither of these images had been used for anything prior, they were just something I shot randomly one day driving around the countryside with my girlfriend. So I thought It was perfect opportunity to take the two, composite them into one awesome looking image, and practice some of the photoshop techniques I've been learning on www.phlearn.com
The first thing I did was carefully select the plane and remove it from it's photo, and transferred it over to the open field. I then had to make the plane much smaller, and try to make it a size that was proportional to the scenery it now resides in.
After finalizing where to place the image in the scene I added a gradient on the plane layer as a clipping mask going from white to dark to simulate the overhead light of the sun affecting the plane. This is important in making the plane look as if it was actually shot in the original scene, and was affected by the sunlight.
After that I applied a gradient map over the entire image in order to change the color toning. I wanted to give it that warm cinematic feeling by adding a lot of reds and yellows to the highlights, and greens and blues to the shadows. That brought me to the image below.

From there is added did some clone stamping/ healing brush to better blend in the wheels with the field, and took out the bright spot in the top left corner, as it was a distraction to me.
Next I did some more color grading to the image. First using a curves adjustment layer to bring in some more reds and yellows to the image to warm things up. After that I applied a levels adjustment curve to bring some more greens and blues into the shadows, and then applied a second gradient map to the image to really bring out more of the orange in the highlights, giving it that old Cuban feel.
And as for that pink layer 4, I used a technique taught on Phlearn.com by Aaron Nace to remove some color casting. What you do is select with the eye dropper tool the color in the area you want to remove the color casting. Then fill your blank layer with it and inverse the layer which will give you the exact opposite color of the one you selected. For me it was in the highlights I believe. What you do next is go to blending mode and choose Color, then change the opacity to 50% or below and there ya go, no more color cast! You can do this for both the highlights and the shadows.
Finally I decided the photo would look better if I clone stamped the pathway and the bushes to completely fill out the bottom of the image instead of having that gravel in the foreground. It took me many many layers as you can see in this image --> 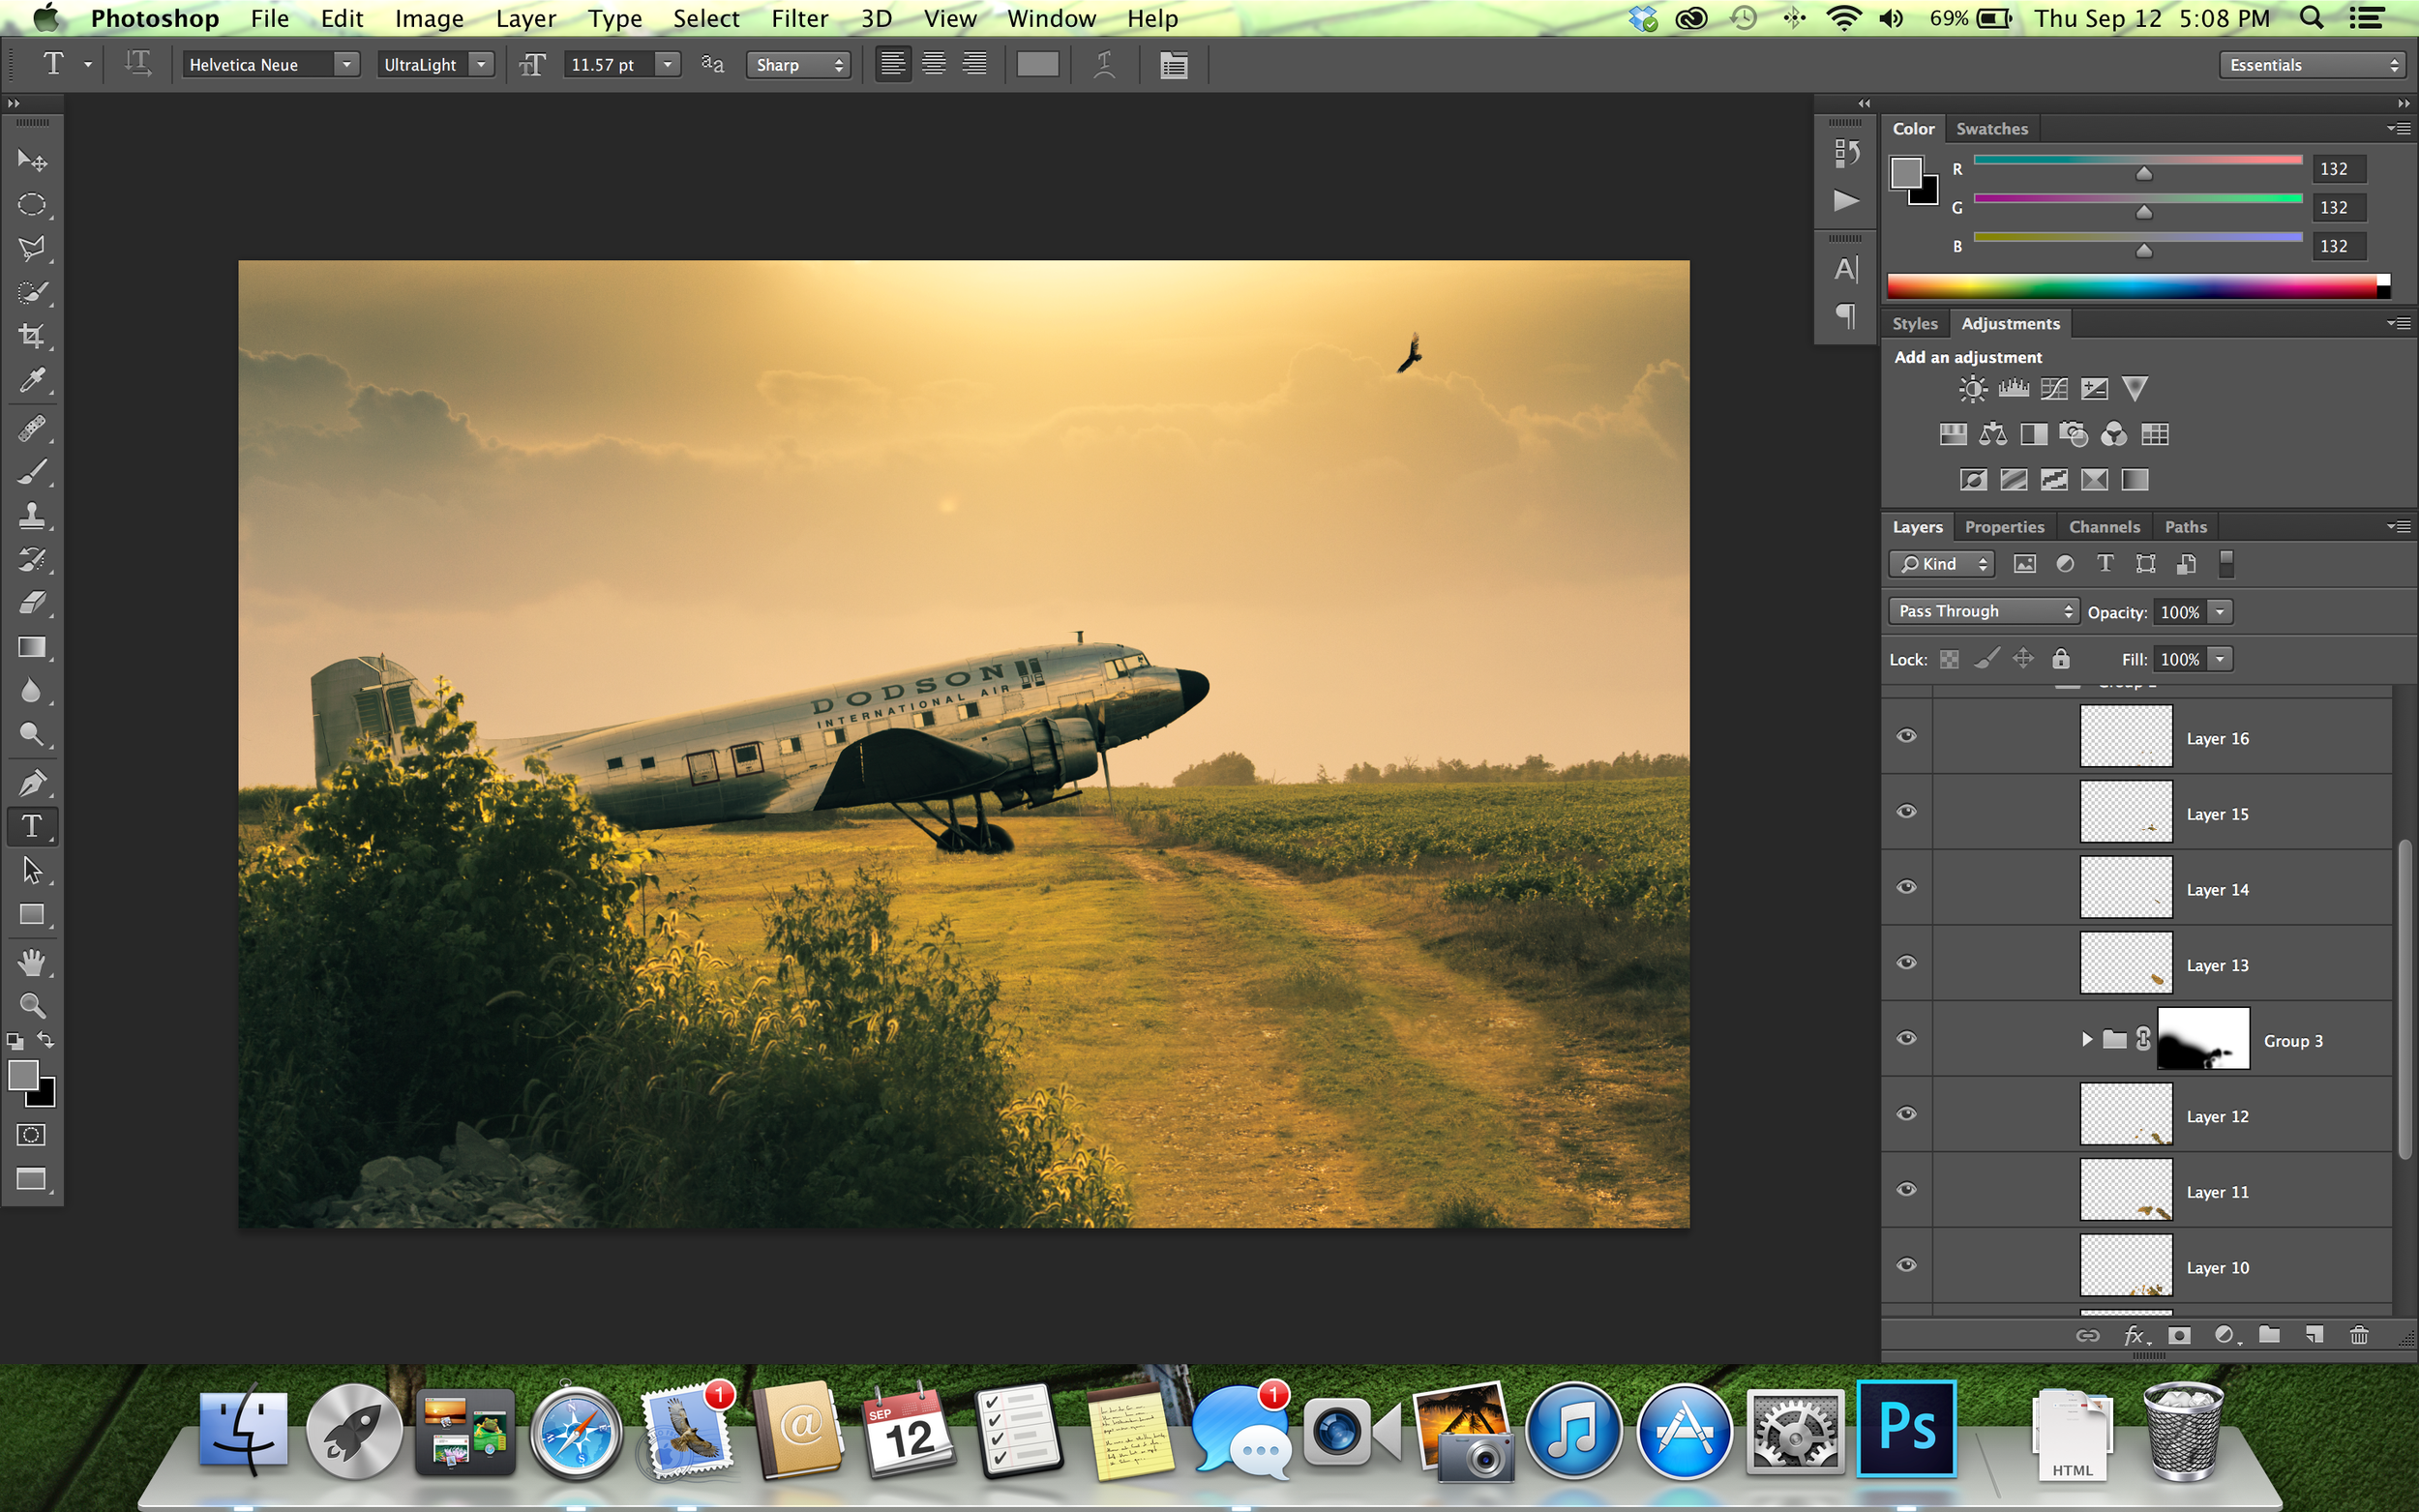
That way if I decided I didn't like something I could just delete that set of layers instead of having to start all over again. I did this for both the road path, and the bushes, making sure to group the layers appropriately and name them all so I knew if i needed to change something I could find it easily.
[hr]
And that brings us to our final image!
[hr]
If you enjoyed this post and would like to see more please remember to subscribe to the blog, and like my Facebook page Brandon Tigrett Photography. As always thanks for reading, and feel free to leave a comment below with any questions you may have on the process!